Introduction
I wanted to share how I use Formik to write forms in my react code. I expect you've already heard and tried Formik before so we can discuss mostly component structure here. This article is not intended to be a full Formik tutorial. Formik docs has all the information you need.
useFormik hook
Out of different ways you can use Formik to create forms, the useFormik hook is the only thing I've ever needed. It takes a config object and returns an object with all the tools we need to create forms.
The minimum values you need to add in the config object are:
-
initialValuesobject - Values that go inside the form fields when the form is rendered. This is the initial state of the form. -
onSubmitfunction - Receives the final values when the user submits the form. Use this function to clean up thevaluesif needed before sending it to the server. -
validatefunction - Run validations on values and return errors. There is an alternativevalidationSchemawhich you can use to define a schema using Yup object schema validation library.
const formik = useFormik({
  initialValues,
  onSubmit,
  validate,
});

const { values, errors, handleSubmit, setFieldValue, ...andManyOthers } =
  formik;
Component Structure
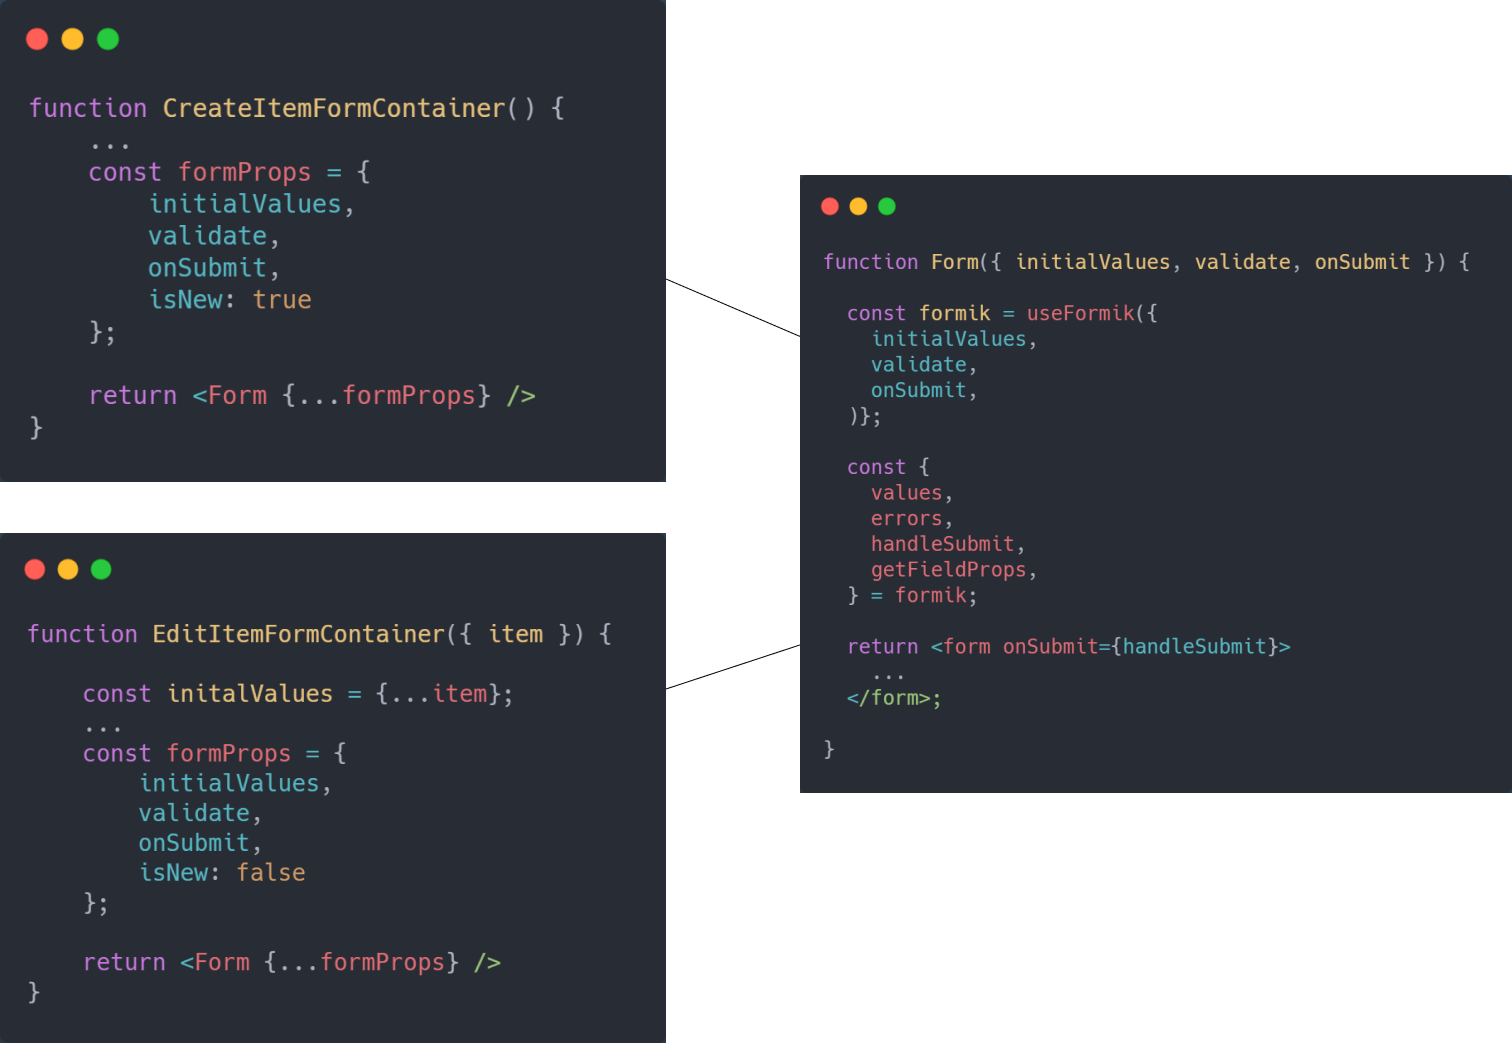
I always use the good old two-level container & presentational structure for forms.
- A container component where I define all the
configthat goes inuseFormik(config)hook. - A presentational component that receives this
configprop and renders the form component.
This structure is a general style to write reusable components. This works even better for forms by creating separate containers for create and edit items but uses the same <Form /> component that displays the form.
For example, a user account form structure looks like this.
<CreateUserFormContainer /><UpdateUserFormContainer /><UserForm />
validate function or validationSchema goes in another file and imported into form containers.
Even if you don't need both create and edit, writing a form container keeps things clear in large forms.
If we are using both forms, I also send an extra isNew prop to <UserForm /> to know whether it's a create form or an edit form. This helps to display correct error messages and other text.

User account form
Here's the CodeSandbox Link to see the code for a sample User account form along with some utils and validations.
Final Thoughts
Although we've only needed the useFormik hook, if you want to create custom fields using Formik elements like <Field>, <ErrorMessage>, useFormik won't work. So, be sure to check useFormik docs to see what are you missing by using the useFormik hook.
If you find yourself writing too many conditionals in JSX to use the same <Form /> for both create and edit or there are a lot of differences in form fields in create and edit forms, it's time to separate them in different components.
You never need to store form data in a global state especially using state-management libraries like Redux or MobX.